Summary
The helix antenna will be what we use to communicate with the balloon during it’s ascent.
Materials
Materials are:-
| Item | Quantity | Notes |
|---|---|---|
| 100mm PVC Pipe | 1 metre | |
| A4 Paper | 4 pieces | |
| 2mm solid Copper wire | 3 metres | |
| Aluminum sheet | 1mm thick 50x50cm | |
| Thin plywood | 5mm sheet of wood | |
| Pipe Diameter reducer | Created from wood, with a 1inch hole in centre for wooden rod | |
| Wooden rod | 1.2 metre 1inch | |
| RG-227U cable | 15cm | |
| Male RP-SMA connector | 1 | |
| Copper Sheet | 3cm x 6cm | |
| Hot-Glue Gun | 1 | Lots of glue sticks |
| Solder | 20cm | |
| 3mm metal screws | 4 | Used to fasten ground plane on to plywood |
| Copper plate | 100mm x 100mm x 0.5mm | |
| Fibreglass Kit | Rougly 4 strips, 6cm wide – total area 0.1m^2 | |
| 4mm metal screws | 4 | Used to fix wooden reducer to PVC pipe |
| Telescope Tripod | 1 | Used Skywatcher 150mm tripod |
| Screws – 60mm x 1/4 inch | 2 | Used to mount wooden rod to the tripod. |
| 1/16 bolt and nut | 2 | Used to attach ground plane to the Antenna tube |
Design Parameters
We obtained details on the design from a number of sites. We ultimately arrived at the following dimensions:-
| Parameter | Value | Notes |
|---|---|---|
| Gain | 12.82 | Theoretical gain |
| Wavelength Reflector | 33.236mm | |
| Circumference | 357.29mm | Equiv diameter of ~113.73mm |
| Spacing between turns | 81.17mm | |
| Length of each turn | 366.39mm | |
| Length of wire needed | 2931.15mm | |
| Antenna Length | 649.39mm | |
| Spray adhesive | 1 can | |
NOTE: some calculators said 106cm diameter was the correct value. I think that there is a lot of margin for error in the Helix antenna…i.e. wide bandwidth, so I’m trying not to get too concerned about getting it ‘exactly’ right.
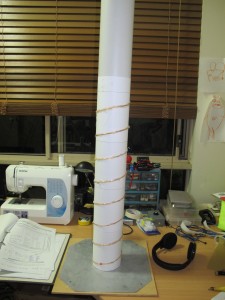
Below is a picture shows the antenna part way through construction.
Construction
The constructions is broken into 5 stages. These stages are listed as follows:-
- Creation of helix coil on former
- Creation of ground plane
- Mount for Tripod
- Attachment of ground plane
- Electronics
- Tuning
Creation of Helix coil on former
We needed to mark on the PVC pipe where the copper wire should follow. We did this by getting some A4 paper and drawing diagonal lines. The design parameters above dictated the gradient of the lines and the spacing. Special care was taken to ensure right hand ‘coil’ was created. The four A4 sheets were then very carefully stuck on to the PVC tube. I then used a hot glue gun to hold the copper wire in place as I wrapped it around the tube. This was quite difficult and I found it best to move myself around the tube as I coiled the copper wire on, rather than trying to move the PVC former. (If I turned the PVC tube around, the wire got harder to coil it).
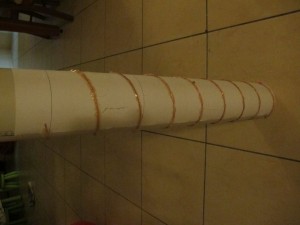
Look closely at the picture above and you will see the hot glue.
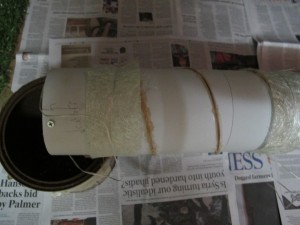
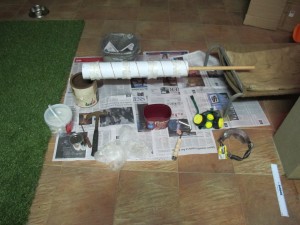
Then we fibreglassed the copper wiring in place using 4 strips of fibreglass. We figured we didn’t need to fiberglass the whole tube because:-
- It is expensive
- It might change frequency more if we use more
- It will increase weight of the antenna, putting more strain on the tripod.
Here are a few pictures of the fibreglassing process.
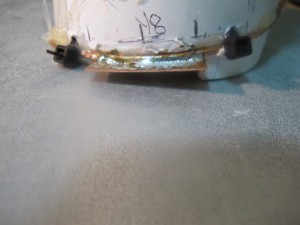
We needed to solder a copper strip in the first 1/4 wavelength of copper wire. This is done to reduce the impedance of the antenna…bringing from about 130 ohms to approximately 50 ohms. A copper strip 1/16 lambda x 1/4 lambda was cut out. Here, lambda is the wavelength – c/f = c/902 x e^6 – 33.33cm. A picture of how this was mounted is shown below.
Creation of Ground plane reflector
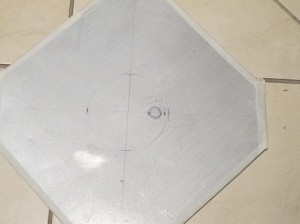
We need a ground plane reflector and we make one using some Aluminum sheet. A square with sides 333mm was cut out. Then the corners were trimmed off. This sheet was then mounted to some plywood of slightly larger dimensions. This provides safety as the Al sheet is quite sharp. We then needed to drill a whole allow the mount rod to pass through. This component is attached to the mounting rod using glue.
A picture of this is provided below.
Tripod Mount
I have a telescope (a 150mm Skywatcher). I noted that I should be able to attach a rod of some description to this, instead of the clamps used to hold the telescope tube. This rod I decided can be attached to the main tube using tube reducers…which are inserted inside the main tube. A picture of these reducers is below.
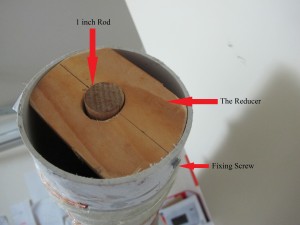
There is a reducer at each end of the PVC tube. Inside the PVC tube is a 1.2 metre length of 25.4mm diameter rod. The rod can wedged into place by rotating the end reducer slightly and tightening up the fixing screws.
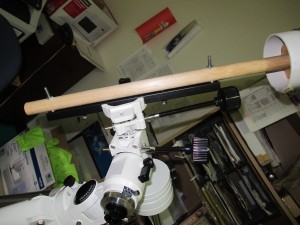
The rod is attached to the black bracket on the telescope. This is done using two 60mm bolt/nuts (1/4 inch diameter). A picture of this is shown below.
Attachment of Ground plane
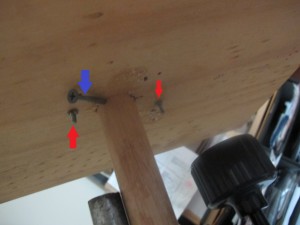
We wanted to attach the ground plane to the 25.4mm wooden tubing. We did this by bringing the wooden reducer right down to the bottom, securing with two screws. Then we put two small 1/16 inch holes in this, dropped two screws down and put these through the ground plane and secured with two nuts. See picture below:-
Below is a picture of antenna with ground plane attached to the tripod. Also notice the metal pole with counter-weight.
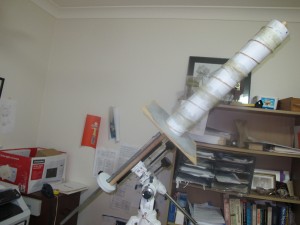
As one can imagine, this makes aiming of the antenna a lot easier. (The antennas does weight a lot!)
Electronics
We need to connect the antenna back to the xbee module which is mounted inside a poly- carbonate box. This box is mounted on to the back of the ground plane. This ensures minimal amount of cable between antenna and xBee module….reduced attenuation of signal.
This was accomplished by:-
- Drilling hole through found plane for cable
- Attachment of Male RP-SMA connector to end of RG-227U cable
- Attachment of Xbee module to the ground plane
Pictures will be added later.
Tuning
We are making a SWR meter using a Directional coupler, a microwave diode and few other components. We hope to confirm a perfectly operating antenna!
Testing
A lot of thought is being put into how best to test the antenna. Essentially, we need to find out the range. We will need help from others to do this.
