
The Launch Electronics sole purpose initially is to provide a safe reliable means of launching our current model rockets. We could easily go for a wire based method with a box with some buttons…a very simple, but effective approach.
…However it was decided that this is not the best approach because we need to look at developing some of the technology required in later launches, including the Rockoon. We don’t wish to however build everything right now, but, but start building something that can be added and extended later. The High Altitude Balloon Electronics worked very well, so decided to draw from that.
The High Level Design
The solution will consist of three components:-
1. The End user device (ipad or iphone), which we will refer to as the Launch Console.
2. The Ground Station is the system the iphone/ipad connects to. The Ground Station will connect to the Remote Launch System via the radio modems
3. The Remote Launch System which will have all the necessary electronics to power, up, test, arm and launch the model rocket.
More information on each of these components is below.
Launch Console
The operator will only require an ipad which can connect to the Ground Station which will act as a Wirelss Access Point. The operator will be able to use a browser to access the Launch System Software.
Ground Station
This will be a small computer, looking at using a Rasberry-Pi 2 Model B. It will have its own RTC module, USB Wifi dongle and be connected to a RFD868 radio modem via serial. It will run PHP/Apache and use SQLLite3 database to store data. The systems used in the balloon launch used a BeagleBone Black. OpenStreetView was a bit sluggish, and so we hope/expect to perform a little better this time. with the Rasberry-Pi.
NOTE: Open Streetview is not required initially for our launch systems, but will be required later down the track.
Remote Launch System
Using something light and something that isn’t power hungry and has lots of GPIO is very important. That is why we have decided to go for EtherMega 2560. A picture of this is below:-
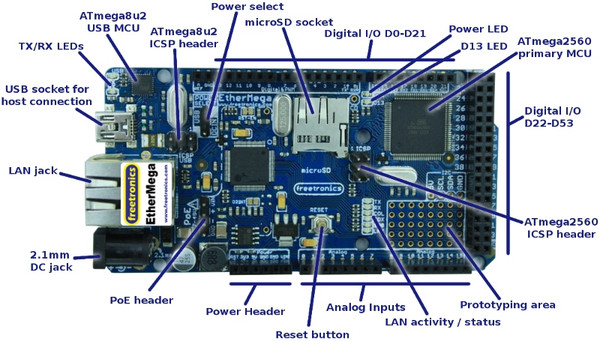
We will initially create a single PCB with relays and Switch Mode PSU to power the relays and RFD868a modems. Later we will add another PCB (sandwiched in between) with GPS, RTC, Air pressure sensor and IMU and Camera.
Two PSU will be required, one to power the micro Electronics and another to power the Igniters.
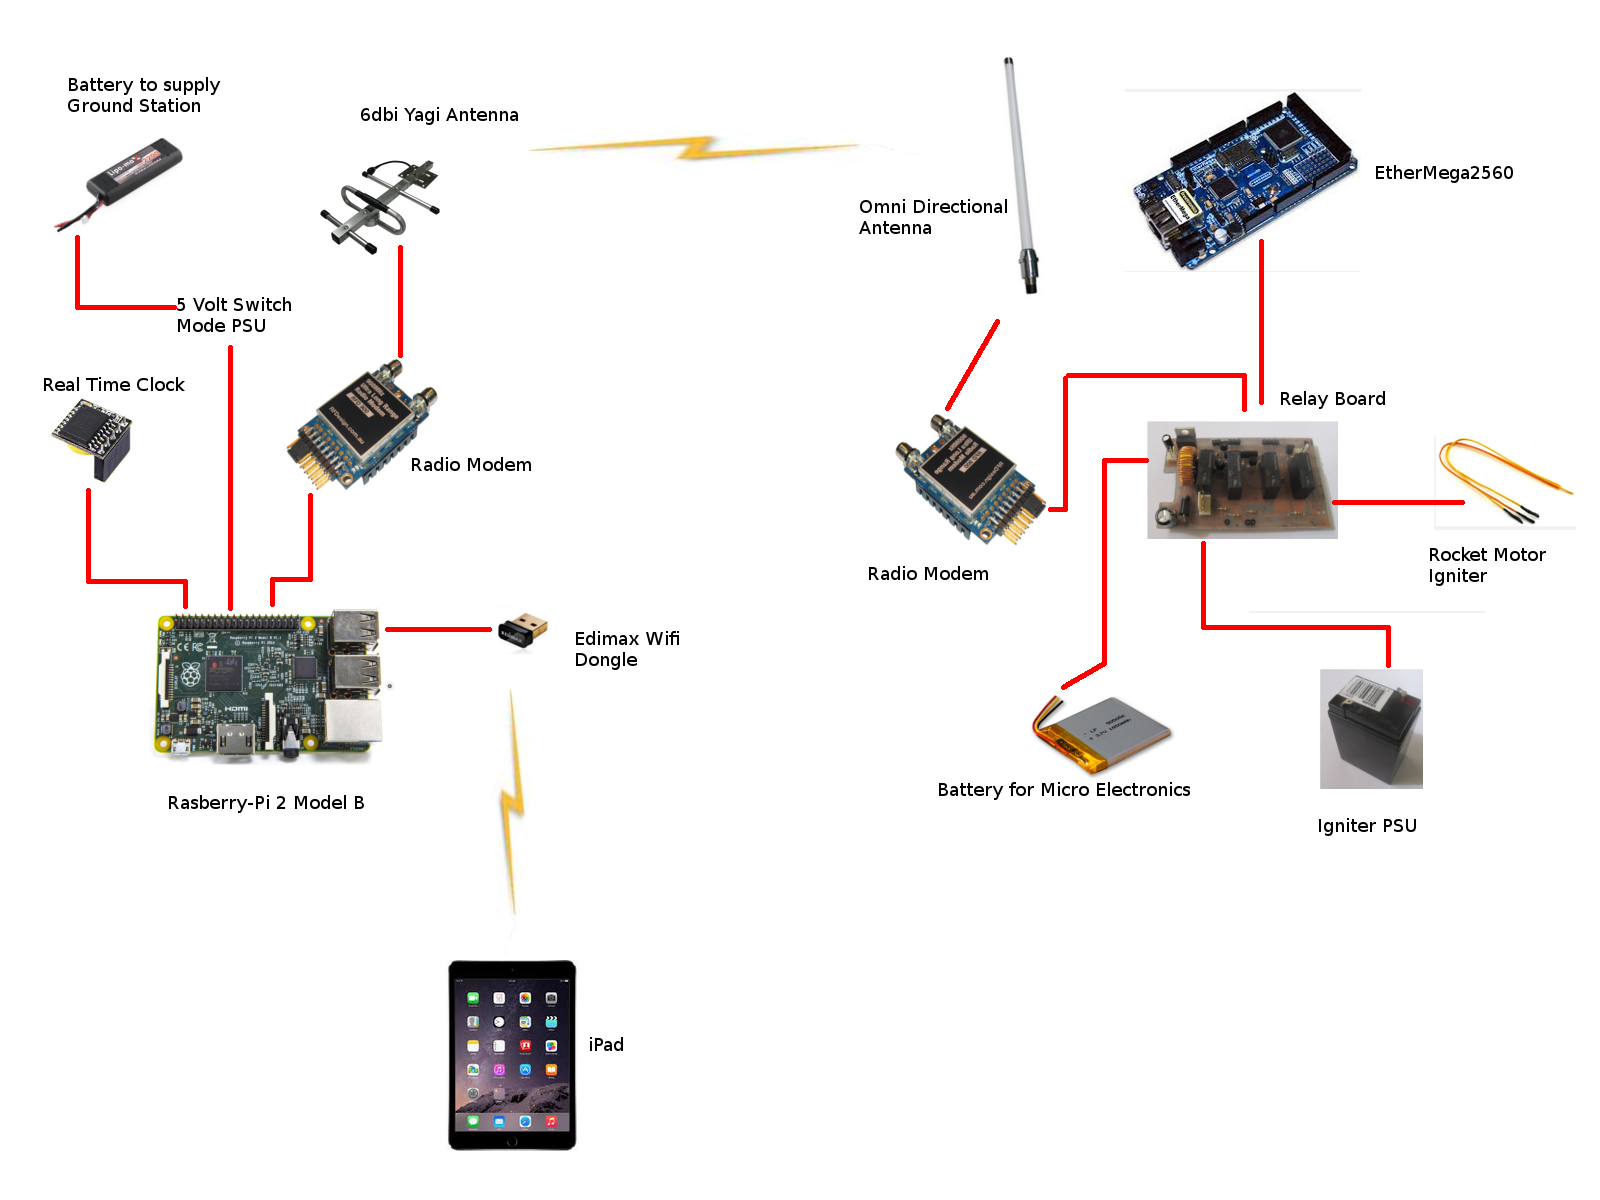
Below is a picture of how I envisage everything will ‘fit’ together.
Summary
One of the great things is that as we progress with bigger model rockets, the launch system will get more and more testing, which will help give us the confidence when the Rockoon is ultimately launched.